Incubating Chicken Eggs: A Step-by-Step Guide
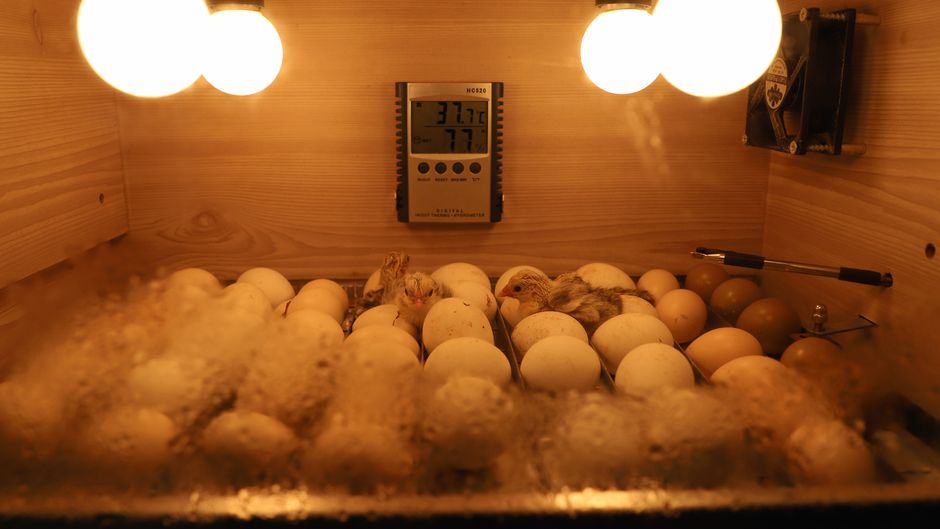
Incubating chicken eggs is a process that requires attention to detail and a clear understanding of the environmental conditions necessary for embryonic development. This guide outlines the key steps involved in using an incubator, from setting up the equipment to the final hatching phase. By following these procedures, you can create a controlled environment that supports the development of healthy chicks.
Successful incubation depends on several critical factors: stable temperature, appropriate humidity, regular egg turning, and proper ventilation. Each of these elements plays a distinct role in the development of the embryo, and any deviation from recommended ranges can impact the outcome. This article will walk you through each stage of incubation, providing context on why these factors matter and how to manage them effectively.
Preparing the Incubator
Before setting eggs, it is essential to prepare the incubator to ensure it functions reliably throughout the incubation period. Start by thoroughly cleaning the incubator with a disinfectant suitable for hatchery equipment. This helps minimize the risk of bacterial contamination, which can affect embryo viability. After cleaning, allow the incubator to dry completely before use.
Next, set up the incubator in a location with stable ambient temperature and minimal drafts. The room temperature should ideally remain between 65°F and 75°F to prevent fluctuations inside the unit. It is also wise to place the incubator on a level surface and ensure it is not exposed to direct sunlight or heating vents, as these can cause uneven temperature distribution.
Once the incubator is positioned, turn it on and allow it to stabilize for at least 24 hours before adding eggs. During this period, monitor the temperature and humidity readings regularly. Calibrate the thermostat and hygrometer according to the manufacturer’s instructions to ensure accuracy. Maintaining a steady temperature of 99.5°F to 100°F for forced-air incubators (or 101°F to 102°F for still-air incubators) is critical for embryonic growth.
Selecting and Setting Eggs
Not all eggs are suitable for incubation. For best results, select eggs that are fresh, clean, and of proper shape and size. Eggs that are cracked, severely misshapen, or dirty may have reduced hatchability. If possible, choose eggs from flocks that are healthy and well-nourished, as the nutritional status of the parent birds directly influences embryo development.
Egg storage before incubation also matters. If eggs cannot be set immediately, store them in a cool, humid place (around 50°F to 60°F) with the pointed end downward. Eggs should be turned at least twice daily if stored for more than a few days to prevent the yolk from sticking to the shell membrane. However, prolonged storage beyond seven to ten days may reduce hatchability.
When it is time to set the eggs, allow them to warm to room temperature gradually over a few hours to prevent condensation on the shell. Place the eggs in the incubator with the pointed end slightly downward to keep the air cell in the proper position. Depending on the incubator’s capacity, you may need to adjust the position to ensure even airflow around each egg.
Managing Temperature and Humidity
Maintaining consistent temperature is the most critical factor in incubation. Fluctuations can disrupt embryonic development and lead to lower hatch rates. For forced-air incubators, a temperature of 99.5°F to 100°F is recommended. For still-air incubators, aim for 101°F to 102°F, but measure the temperature at the top of the eggs, as warm air rises.
Humidity levels also require careful monitoring. During the first 18 days, relative humidity should be kept around 50-60%. This prevents excessive moisture loss from the eggs. To achieve this, you may need to add water to the incubator’s moisture pan or use a hygrometer to check conditions. It is important to adjust humidity based on the incubator’s design and the ambient humidity of the room.
In the final three days before hatching, humidity should be increased to 70-80% to help soften the shell and facilitate the chick’s exit. This can be achieved by adding more water or using a wet sponge. However, exact requirements may vary, so it is advisable to monitor weight loss of eggs or use calibrated tools to ensure proper moisture levels.
Regularly check temperature and humidity at least twice a day, but avoid keeping the incubator open for extended periods. Opening the incubator causes shifts in temperature and humidity, which can be detrimental. Use the incubator’s viewing window whenever possible to minimize disturbances.
Turning Eggs
Egg turning is necessary to prevent the embryo from sticking to the shell membrane and to promote proper development. For the first 18 days, eggs should be turned at least three to five times daily. Ideally, an automatic egg turner can handle this task, but manual turning works if done consistently.
When turning eggs manually, mark each egg with an “X” and an “O” on opposite sides so you can keep track of which side is up. Turn the eggs 90 degrees from their previous position, alternating the direction each time. This ensures that the embryo is rotated fully and does not settle in one position.
Stop turning eggs on day 18, as the chicks will position themselves for hatching. At this point, remove the eggs from the turner if present, and place them on a hatching tray. This period is called “lockdown,” and during this time, you should not open the incubator unless absolutely necessary to maintain the high humidity needed for hatching.
Regular turning helps in the even distribution of nutrients and waste products within the egg. It also prevents the embryo from becoming stuck, which can lead to developmental issues. Consistency is more important than turning frequently in large bursts; a steady schedule is best.
Candling and Monitoring Embryo Development
Candling is a method used to check the development of the embryo by shining a bright light through the egg. This can be done at various stages to assess fertility and development. Around day 7 to 10, you can observe the embryo as a dark spot with tiny blood vessels forming a web. Clear eggs that show no signs of development are likely infertile and can be removed to free up space and prevent potential contamination.
Repeat candling around day 14 to ensure continued growth. By this time, the embryo should be filling a larger portion of the egg, and you may see movement. However, not all eggs will develop at the same pace, so be cautious not to discard eggs that are simply developing slower.
Candling also helps you monitor the air cell size, which expands as the embryo uses oxygen and loses moisture. A properly sized air cell indicates appropriate moisture loss. If the air cell is too small or too large, you may need to adjust humidity levels accordingly. However, make adjustments gradually to avoid sudden changes.
Throughout the incubation process, it is important to keep detailed records of temperature, humidity, and any observations. This documentation can help you identify patterns and make informed decisions for future incubation cycles. If you notice problems such as hatching failures, the log can be a valuable tool for troubleshooting.
Hatching and Post-Hatch Care
As the incubation period nears its end, you may hear chicks peeping and see them pipping at the shell. The incubation period for chicken eggs is approximately 21 days, but this can vary by breed and individual differences. During hatching, it is crucial to maintain high humidity and avoid opening the incubator until most chicks have hatched and are dry. Opening the incubator can cause humidity to drop and may shrink the membrane around the chicks, making it harder for them to escape the shell.
Once the chicks have hatched, leave them in the incubator until they are fluffy and dry. This usually takes a few hours. Then transfer them to a pre-warmed brooder with a heat source, fresh water, and starter feed. Ensure the brooder temperature is around 95°F for the first week, gradually decreasing by 5°F each week.
It is important to sanitize the incubator and all equipment after the hatch is complete to prevent disease transmission. Dispose of unlikely eggs and any debris properly. Assist only if a chick is clearly struggling for an extended period, but note that intervening too early can cause harm. In most cases, it is best to allow nature to take its course.
Remember that successful hatching depends on many factors, including the quality of the eggs, genetics, and the conditions during incubation. Even with diligent care, hatch rates may not be 100%, and it is important to approach the process with patience and a willingness to learn from each experience.
By following these steps and understanding the principles behind them, you can increase the likelihood of a successful hatch. Whether you are a hobbyist or a small-scale producer, mastering the art of incubation requires practice and continuous observation. Always consult local resources or avian specialists if you encounter specific challenges, as they can provide guidance tailored to your situation.